
· It even splits when paid professionals try to make it not split. This is good news for those of you wanting to snuggle by a warm fire, but not such good news for connoisseurs of splitfree wood. And, it is especially bad news for anyone wanting to make a round table top out of a slice of tree.
· Make your strolling path. After you've built your hills and water elements, you should build a strolling path into your garden. You can use gravel, pebbles, wooden planks, or large stepping stones to make your walkway. Your path should flow nicely through your garden.
· The stone wall here separating both rooms has a fireplace in between with glass screen that warms up both the regions at the same time while maintaining privacy. Stylish stone wall creates a subtle division between both areas with its color too as the living room has dark tones while the dining area and kitchen beyond is bright and white.
However, a kitchen may not always lend itself to being divided in this way – and not everyone has the luxury of a separate dining room. Using the whole room, instead, as one blended cookingdining space can actually make it seem bigger – and even allow for a .
Try this easy doityourself project with stepbystep instructions on building and installing a flipdown table for two. How to Make a Headboard From Upcycled Leather Belts See how a bunch of thriftstore belts were turned into a highend looking, ombre headboard.

Construct the Box. Rip oak plywood into four pieces of the desired column width and height. You don't have to rip them at an angle, since the trim will cover the cut edges. Attach three of the pieces with glue and nails to make a long, threesided box. Cut two pieces of scrap 1" x 1" (or other scrap wood) to a length that's about 2/3 of the ...
· Build a sharpening station like this with help from a free plan by Tom Fidgen.. He starts by building a square and stable base and a flat top. Then he adds specialized sharpening accoutrements including a granite insert, a drawer to hold sharpening stones, and a walnut tool tray.
However, a kitchen may not always lend itself to being divided in this way – and not everyone has the luxury of a separate dining room. Using the whole room, instead, as one blended cookingdining space can actually make it seem bigger – and even allow for a bigger table.
Any tools we had to purchase for this build, we shopped around on local yard sale pages and found secondhand tools which were still in great condition. Be sure to shop around for your materials before buying to save the most money. 2. Grade the Land. To start building a barn, you should grade the area where your barn is going to be.

· MDF cores are not as strong as most lumber and plywood, but when joining together pieces of MDF, you can use just about any joint that you would use with plywood: butt joints with screws, biscuits, splines, fully rabbeted edges, and rabbeted tongues in dadoed grooves (see photos, right).
· You can use a table saw or a chop saw to make 45• cuts on the ends of two of your boards. I used my double bevel saw to make the cuts. Step 2: Glue and nail the boards in place. This step is easiest done with two people, so grab a helper if you can find one! Place wood glue on the edge of your boards and nail boards in place.
Although it's impossible to create a new table style from selected table in Word, you can save the selected table as a Quick Table easily for reusing by clicks. Please do as follows: 1. Open the source document whose table you will save as table style, select the whole table, and press Ctrl + C keys together to copy it. 2.
· To build a router table, first use a tablesaw to carefully cut a sheet of ¾inch plywood to 2 feet by 4 feet, which will serve as your table top. Then, to make the underside frame of the table, cut 2 2 by 4 boards to 17 inches long, and 2 2 by 4 boards to 45 inches.
· 1. DIY Lazy Susan Directions. You would love to put this together for your dining table. It is easy on your pocket and quite simple to make. A round pine piece, a rotating spice holder, bonding glue and paint are the basic supplies. DIY Lazy Susan. 2. Make a Lazy Susan. A wooden stool is repurposed for this lazy Susan.

The Shakers produced many incredible furniture objects that we continue to venerate today. For the woodworker the fascination is often rooted in the essential simplicity of the work. Interest in Shaker design is as strong today as it was when the first edition of this book was published in .
· Round salt, not surprisingly, flows more easily and is less likely to stick together. In research scheduled to appear in the July 5 issue of the journal Crystal Growth Design, Dr. Ghosh and ...
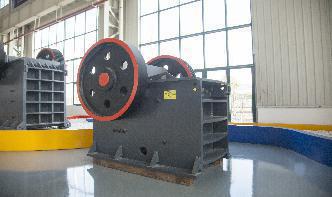
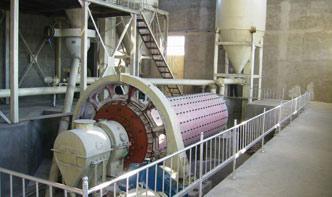
DOVE Shaker Table (Gold Shaker Table) is the most metallurgical efficient and selective wet gravity separation (Gravity Concentration) device, which offers exceptional efficiency and features in minerals separation that other existing tables in the industry with roughsurface covering cannot achieve.. DOVE Shaker Table is the most efficient Concentrating Table in the industry designed for high ...
· Here's a beautiful DIY farmhouse table that features a stunning table along with two benches. It's inspired by a Pottery Barn farmhouse table but only costs 100 to build. A PDF of the free plans includes diagrams, a cut list, a materials list, and building directions. DIY Pottery Barn Inspired Farmhouse Dining Table Plan from Shanty 2 Chic.
· Make sure that the screws won't penetrate the top when screwed in. If you are ever in doubt, then hold a screw next to it to see how far it'll go into the next piece. How to Pour Epoxy on Bar Top. After building this home bar, I poured epoxy on the top to add shine and protection.
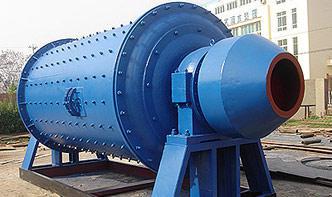
Our Xtruder 255 gold shaker table, which is similar to the Gemini, is considered a gold shaking table or sometimes called a gold finishing table and is the final step before smelting. The shaker table is simple to operate, has full variable speed control, has a capacity of up to 255 pounds per hour, and can recover fine gold down to 400 mesh with a minimal water requirement of 6 to 10 gallons ...

· Learn how to build a picnic table in just one day with this easytofollow tutorial. This professionalquality wooden picnic table, made with composite, is sturdy, simple, and holds up great. This DIY composite picnic table is sure to be a hit at your next barbecue.

Because it doesn't deteriorate over time, gravel is common as a permanent mulch around shrubs and trees. However, if you put gravel down on the ground without soilblocking landscaping cloth beneath it, eventually the gravel begins to sink into the soil, creating a dirtfilled gravel mulch.

· To make a table, start by purchasing sheets of wood, like pine or poplar. Then, cut the wood to size and assemble the table top using tongue and groove planking, glue, and clamps. After you've assembled the top, screw or glue 4 strips of wood around the bottom of the table to make the under table. Next, cut 4 table legs that are all the same size.